| Version 4 (modified by , 11 years ago) (diff) |
|---|
Using The Desktop Plugin In ExoGENI
The DETER lightweight federation system is a simple way to join your ExoGENI experiment with a DETER experiment. The ExoGENI experiment can dynamically join an experiment in DETER when the DETER experiment is created using the federation system. When the DETER experiment is terminated, the ExoGENI environment remains intact and can be reconnected to a similar experiment or to a different DETER experiment. The technology in general is also called DETER desktop federation.
The federation system accomplishes this by using a node that the experimenter adds to the ExoGENI topology that talks to DETER through its ExoGENI management interface. Traffic to or from DETER will currently pass through the management interfacs as well, though we expect to expand to using other ExoGENI facilities in the near future.
The federation node runs an image DETER provides and needs some simple configuration from the ExoGENI experimenter to coordinate with DETER. In the simplest case, that configuration consists of:
- The IP address on which DETER can reach the management interface
- The DETER(s) user who is allowed in create experiments that talk to this ExoGENI slice
The rest of this document describes how to get and use the lightweight federation technology in ExoGENI.
Getting The Lightweight Federation Image and Getting DETER Federation Rights
The lightweight federation image can currently be found at http://www.isi.edu/~faber/tmp/fedd.xml . Its SHA1 hash is 9ff5313464521f228cdfd7e2e2d2a6c5a0eb8ae0.
Adding these lines to your .flukes.properties file on your desktop will make the image accessible from flukes menus. (Change the number in image1 to be an unused number if you already have custom images defined.
image1.name=Fedd-enabled Ubuntu 12.04
image1.url=http://www.isi.edu/~faber/tmp/fedd.xml
image1.hash=9ff5313464521f228cdfd7e2e2d2a6c5a0eb8ae0
In addition, users will need to get ther DETER accounts authorized to create federated experiments. DETER administration controls this facility because it allows users to reach outside DETER, which we normally do not allow. To get an account authorized for federation, contact faber@….
Connecting a Single ExoGENI node to a DETER Experiment
The simplest form of lightweight federation is to conect a single ExoGNEI node to a deter experiment. We do this by creating a single-node ExoGENI slide that runs teh federation software and connecting a DETER experiment to it when that experiment is created.
To create the single-node ExoGENI experiment, create one a single node slide using the federation image above. When the slice exists, log in to the node and configure the federation software. To do that the experimenter needs to know the two facts above.
The image provides a script to set up a single node for federation. The script and the federation configuration both are stored in the /usr/local/etc/fedd directory. To configure the federation system, log into the node, change directory to /usr/local/etc/fedd and run the init_fedd script there. It takes 2 parameters, the management IP address and the experimenter to authorize. The following sequence will configure fedd to allow user "faber" to contact DETER using IP address 192.1.242.14:
~# cd /usr/local/etc/fedd
/usr/local/etc/fedd# ./init_fedd 192.1.242.14 faber
When that script completes, start the federation system on the ExoGENI node. When debugging we recommend leaving a window open and running the daemon as:
# fedd.py --config /usr/local/etc/fedd/desktop.config --debug
You can also run it in the background, logging to /var/log/fedd.log by:
# touch /var/log/fedd.log
# fedd.py --config /usr/local/etc/fedd/desktop.config --logfile /var/log/fedd.log &
There are some detailed debugging messages that libraries and other dependent software produce that are visible with --debug that are lost during normal logging.
Attachments (3)
-
desk.tcl (675 bytes) - added by 11 years ago.
Desktop federated topology
-
desk.png (7.9 KB) - added by 11 years ago.
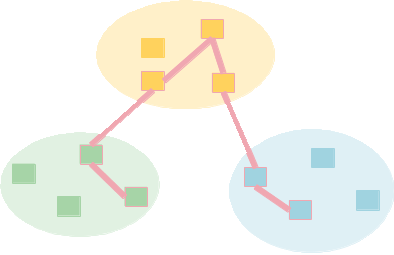
Visualization of that topology
-
ExoGENI.png (24.6 KB) - added by 11 years ago.
Simple ExoGENI topology
Download all attachments as: .zip
